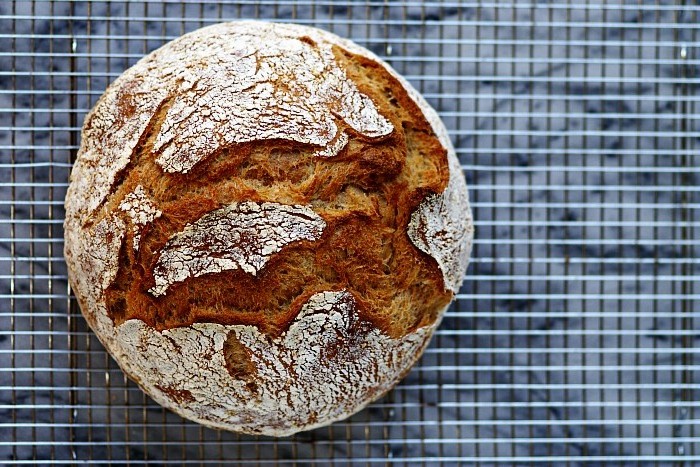
We’ve adapted this no-knead homemade bread recipe from San Francisco-based cookbook author and cooking teacher Penni Wisner’s foolproof formula. A long fermentation and baking the bread in a preheated Dutch oven yields artisanal results at home. You can play with different mix-ins—substitute golden raisins and walnuts for the olives and rosemary, for instance, or stir in chunks of bittersweet chocolate for a variation of pain au chocolat. For the best results, Wisner recommends using a kitchen scale to weigh the flour, salt and water. It's an essential for great at-home bread-baking.
Ingredients
- 13 ounces unbleached organic bread flour, plus extra for shaping
- 7 ounces white whole wheat flour
- 3/8 ounce sea salt
- 1 cup Kalamata olives, coarsely chopped
- 3 tablespoons fresh rosemary, chopped
- 16 ounces water (by weight)
- 1/4 teaspoon active dry yeast* (or 1 ounce sourdough starter)
Instructions
- Put a 3-quart bowl on a kitchen scale. Weigh out the flours and salt. Add the olives and rosemary. Stir with a wooden spoon, and make a well in the center of the dry ingredients. Add the water and yeast (or sourdough starter). Stir with a wooden spoon until it gets too heavy, and then switch to a rounded bowl scraper. Dribble in more water, if needed, to make a sticky, ragged mass. Cover with plastic wrap (Wisner likes to use a travel shower cap, which works like a charm), and let stand at room temperature for 18-24 hours.
- If you have time, during the first 2 hours or so, use the dough scraper to fold the dough over on itself about (scrape around the edge of the bowl, pulling the dough into the center) every half-hour. After a couple of repeats, the mass will come together into a smooth, wet dough. The folding also helps distribute the yeast more quickly. If you’re going out, do at least one turn 15 minutes after the initial mixing and, if you can squeeze it in, another 15 minutes after the first.
- When the dough is very bubbly, and at about the top of the bowl (18-24 hours), scrape it down with the dough scraper. Dust a counter fairly heavily with bread flour (more heavily if the dough seems scarily wet). Dust the top with more flour (observing same principle as before). Fold the dough over onto itself—pick up one side and fold it to the middle, then the opposite side, then the top, and then the bottom. Press down lightly, adding more flour as needed, and repeat the folding one more time. Flip the dough over and shape it very gently, cupping it between your palms and rotating it, into a ball. Cover with plastic wrap (or the shower cap, or upend the bowl over the dough), and let it rest 15 minutes.
- Meanwhile, get out a medium-sized cutting board, or the bottom of a cookie sheet, and lay a clean tea towel on it. Dust the towel lightly with flour and then generously with polenta. (This prevents the dough from sticking to the towel during its final rise/proofing.)
- Gently reshape the rested dough into a ball, and place it, seam-side-down, on the tea towel. Dust it lightly with bread flour and then with polenta. Cover with another tea towel, and place the board and dough in a large plastic bag (a kitchen garbage bag works well) to proof. Let stand 1 hour.
- While the dough proofs, place a 5-quart cast-iron Dutch oven and lid in the oven, and preheat the oven to 500°F.
- Remove the dough from the plastic bag, and set it somewhere where it will be easy to transfer the dough into the preheated Dutch oven. Remove the Dutch oven from the oven, and remove the lid. Remove the top tea towel, and flip the dough into the pot. The dough will now be seam-side up. (This is important, as the loaf will open along the seam as it rises. If the dough drops seam-side-down into the pot, just use a sharp knife to cut a slit in the top of the dough, so it can rise properly.) Grasp the pot with your hot pads, and give it a good shake to make sure the bread rolls easily in the pot and is not sticking. Recover the pot, and return it to the oven.
- Immediately lower the heat to 425°F. Bake 30 minutes. Remove lid from Dutch oven, and bake an additional 30 minutes, or until the bread is dark gold on top. Immediately turn the loaf out onto a rack to cool.
Makes 1 loaf.
* If your yeast is fresh, there’s no need to bloom it in warm water. But if, like me, you keep it in a jar in the fridge, or it has been sitting in the pantry for a long time, go ahead and bloom it in warm 100-110°F water for 5 minutes. I usually warm up a portion of the water used for the recipe, and bloom the yeast in that.
Want to learn how to master nourishing, easy weeknight meals (without spending hours in the kitchen)?Click here to register for my free training!